Istio
官网: https://istio.io
版本支持
| 版本|新版本 | 发行日期 | 生命周期结束 | 支持的 Kubernetes 版本 | 已测试,但不支持 |
|---|---|---|---|---|
| 1.24|1.24.3 | 2024.11.7 | 预计2025.8 | 1.28, 1.29, 1.30, 1.31 | 1.23, 1.24, 1.25, 1.26, 1.27 |
| 1.23|1.23.5 | 2024.8.14 | 预计2025.5 | 1.27, 1.28, 1.29, 1.30 | 1.23, 1.24, 1.25, 1.26 |
| 1.22|1.22.8 | 2024.5.13 | 预计2025.1 | 1.27, 1.28, 1.29, 1.30 | 1.23, 1.24, 1.25, 1.26 |
| 1.21|1.21.6 | 2024.3.12 | 2024.9.27 | 1.26, 1.27, 1.28, 1.29 | 1.23, 1.24, 1.25 |
| 1.20|1.20.1 | 2023.11.14 | 2024.4.24 | 1.25, 1.26, 1.27, 1.28 | 1.23, 1.24 |
| 1.19|1.19.5 | 2023.07.05 | 2024.4.4 | 1.25, 1.26, 1.27, 1.28 | 1.21, 1.22, 1.23, 1.24 |
| 1.18|1.18.6 | 2023.06.03 | 2024.1.4 | 1.24, 1.25, 1.26, 1.27 | 1.20, 1.21, 1.22, 1.23 |
| 1.17|1.17.8 | 2023.02.14 | 2023.10.27 | 1.23, 1.24, 1.25, 1.26 | 1.16, 1.17, 1.18, 1.19, 1.20, 1.21, 1.22 |
| 1.16|1.16.7 | 2022.11.15 | 2023.07.25 | 1.22, 1.23, 1.24, 1.25 | 1.16, 1.17, 1.18, 1.19, 1.20, 1.21 |
| 1.15|1.15.7 | 2022.08.31 | 2023.04.04 | 1.22, 1.23, 1.24, 1.25 | 1.16, 1.17, 1.18, 1.19, 1.20, 1.21 |
| 1.14|1.14.6 | 2022.05.24 | 2022.12.27 | 1.21, 1.22, 1.23, 1.24 | 1.16, 1.17, 1.18, 1.19, 1.20 |
| 1.13|1.13.9 | 2022.02.11 | 2022.10.12 | 1.20, 1.21, 1.22, 1.23 | 1.16, 1.17, 1.18, 1.19 |
| 1.12|1.12.9 | 2021.11.18 | 2022.07.12 | 1.19, 1.20, 1.21, 1.22 | 1.16, 1.17, 1.18 |
| 1.11|1.11.8 | 2021.08. 12 | 2022.03.25 | 1.18, 1.19, 1.20, 1.21, 1.22 | 1.16, 1.17 |
| 1.10|1.10.6 | 2021.05.18 | 2022.01.07 | 1.18, 1.19, 1.20, 1.21 | 1.16, 1.17, 1.22 |
| 1.9|1.9.9 | 2021.02.09 | 2021.10.08 | 1.17, 1.18, 1.19, 1.20 | 1.15, 1.16 |
| 1.8|1.8.6 | 2020.11.10 | 2021.05.12 | 1.16, 1.17, 1.18, 1.19 | 1.15 |
| 1.7|1.7.8 | 2020.08.21 | 2021.02.25 | 1.16, 1.17, 1.18 | 1.15 |
| 1.6-|1.6.14 | - | - | - | - |
新版本是相对2025.3.1来说的,如果有需要可前往GitHub:https://github.com/istio/istio寻找新版本。
下载Istio
解压
tar -xvf istio-1.xx.xx-linux-amd64.tar.gz改名(可选)
mv istio-1.xx.xx istio进入istio目录
cd istio安装目录下包含
bin/ 目录下的 istioctl 客户端二进制文件
samples/ 目录下的示例应用程序
将 istioctl 客户端加入搜索路径(Linux or macOS),或将安装目录/bin加入/etc/profile
export PATH=$PWD/bin:$PATHistioctl 自动补全
暂时不填写,留个坑安装
对于学习安装,采用 demo配置组合。 选择它是因为它包含了一组专为测试准备的功能集合,另外还有用于生产或性能测试的配置组合。
用于生产可以使用默认的default配置组合
istioctl install --set profile=demo -y✔ Istio core installed
✔ Istiod installed
✔ Egress gateways installed
✔ Ingress gateways installed
✔ Installation complete安装插件
kubectl apply -f samples/addons
kubectl rollout status deployment/kiali -n istio-system
2、给命名空间添加标签,指示 Istio 在部署应用的时候,自动的注入 Envoy 边车代理:
$ kubectl label namespace default istio-injection=enablednamespace/default labeled3、给命名空间标记自动注入
kubectl label namespace 命名空间名 istio-injection=enabled在内网注入时可将镜像传到Harbor仓库。在istio-system命名空间配置字典修改istio-sidecar-injector的values配置数据为:"hub": "仓库地址/istio",其他的可在对应的yaml下修改。
设置入站IP
强制指定EXTERNAL-IP
[root@master ~]# kubectl get svc istio-ingressgateway -n istio-system
NAME                      TYPE          CLUSTER-IP       EXTERNAL-IP      PORT(S)        AGE
istio-ingressgateway   LoadBalancer   10.103.144.193     <pending>   15021:30724/TCP,80:30242/TCP,443:30686/TCP,31400:30136/TCP,15443:32537/TCP   93m
设置
EXTERNAL-IP的值之后, 你的环境就有了一个外部的负载均衡,可以用它做入站网关。 但如果EXTERNAL-IP的值为<none>(或者一直是<pending>状态), 则你的环境则没有提供可作为入站流量网关的外部负载均衡。bash# 设置 EXTERNAL-IP -- 仅作为学习使用,不确定是否能用于生产 [root@master ~]# kubectl edit svc istio-ingressgateway -n istio-system # 在spec下添加,规划的IP externalIPs: - 192.168.10.110保存退出
bash[root@master ~]# kubectl get svc istio-ingressgateway -n istio-system NAME TYPE CLUSTER-IP EXTERNAL-IP PORT(S) AGE istio-ingressgateway LoadBalancer 10.103.144.193 192.168.10.110 15021:30724/TCP,80:30242/TCP,443:30686/TCP,31400:30136/TCP,15443:32537/TCP 96m
通过metallb本地负载均衡分配
配置 kube-proxy 的配置文件,启用严格的 ARP
apiVersion: kubeproxy.config.k8s.io/v1alpha1
kind: KubeProxyConfiguration
mode: "ipvs"
ipvs:
  strictARP: true
安装metallb
kubectl apply -f https://raw.githubusercontent.com/metallb/metallb/v0.14.9/config/manifests/metallb-native.yaml配置地址池
apiVersion: metallb.io/v1beta1
kind: IPAddressPool
metadata:
  name: first-pool
  namespace: metallb-system
spec:
  addresses:
  # 选择一种也行
  - 192.168.10.0/24
  - 192.168.9.1-192.168.9.5
  - fc00:f853:0ccd:e799::/124
正常情况就可以分配了
配置域名访问
域名解析方式可自行选择:hosts、dnsmasq、bind、其他域名解析方案。能访问到就行
不带ServiceAccount
Deployment
apiVersion: apps/v1
kind: Deployment
metadata:
  name: test
  namespace: test
spec:
  replicas: 1
  selector:
    matchLabels:
      app: test
  template:
    metadata:
      labels:
        app: test
    spec:
      containers:
      - image: docker.io/kennethreitz/httpbin
        imagePullPolicy: IfNotPresent
        name: test
        ports:
        - containerPort: 80
Service
apiVersion: v1
kind: Service
metadata:
  name: test
  namespace: test
  labels:
    app: test
spec:
  ports:
  - name: http
    port: 9000
    targetPort: 80
  selector:
    app: test
Gateway
apiVersion: networking.istio.io/v1alpha3
kind: Gateway
metadata:
  name: test-gateway
  namespace: test # 命名空间
spec:
  selector:
    istio: ingressgateway # 使用Istio默认网关实现
  servers:
  - port:
      number: 80 # 监听端口
      name: http
      protocol: HTTP
    hosts:
    - "test.example.com" # 域名
VirtualService
apiVersion: networking.istio.io/v1alpha3
kind: VirtualService
metadata:
  name: test-vs
  namespace: test # 命名空间
spec:
  hosts:
  - "test.example.com" # 域名
  gateways:
  - test-gateway # 与Gateway的name对应
  http:
  - match:
    - uri: # 规则
        prefix: /status
    - uri:
        prefix: /delay
    route:
    - destination:
        port:
          number: 9000 # Service 的 port
        host: test #  Service 的 name
带ServiceAccount
【暂时不知道为啥要加ServiceAccount】
ServiceAccount
apiVersion: v1
kind: ServiceAccount
metadata:
  name: httpbin
Deployment
apiVersion: apps/v1
kind: Deployment
metadata:
  name: httpbin
spec:
  replicas: 1
  selector:
    matchLabels:
      app: httpbin
      version: v1
  template:
    metadata:
      labels:
        app: httpbin
        version: v1
    spec:
      serviceAccountName: httpbin
      containers:
      - image: docker.io/kennethreitz/httpbin
        imagePullPolicy: IfNotPresent
        name: httpbin
        ports:
        - containerPort: 80
Service
apiVersion: v1
kind: Service
metadata:
  name: httpbin
  labels:
    app: httpbin
    service: httpbin
spec:
  ports:
  - name: http
    port: 8000
    targetPort: 80
  selector:
    app: httpbin
Gateway
kubectl apply -f - <<EOF
apiVersion: networking.istio.io/v1alpha3
kind: Gateway
metadata:
  name: httpbin-gateway
spec:
  selector:
    istio: ingressgateway # 使用Istio默认网关实现
  servers:
  - port:
      number: 80 # 监听端口
      name: http
      protocol: HTTP
    hosts:
    - "httpbin.example.com" # 域名
EOF
VirtualService
kubectl apply -f - <<EOF
apiVersion: networking.istio.io/v1alpha3
kind: VirtualService
metadata:
  name: httpbin
spec:
  hosts:
  - "httpbin.example.com" # 域名
  gateways:
  - httpbin-gateway # 与Gateway的name对应
  http:
  - match:
    - uri:
        prefix: /status
    - uri:
        prefix: /delay
    route:
    - destination:
        port:
          number: 8000 # Service 的 port
        host: httpbin #  Service 的 name
EOF
配置https访问
生成证书
准备 TLS 证书和私钥
单域名证书
openssl req -x509 -nodes -days 3650 -newkey rsa:2048 \
  -keyout key.pem \
  -out cert.pem \
  -subj "/CN=www.liulike.top/O=liulike"
泛域名证书
openssl req -x509 -nodes -days 3650 -newkey rsa:2048 \
  -keyout key.pem \
  -out cert.pem \
  -subj "/CN=*.liulike.top/O=liulike" \
  -addext "subjectAltName=DNS:*.liulike.top,DNS:liulike.top"  # 同时包含主域名和泛域名
生成后会有两个文件:cert.pem、key.pem
验证证书内容
openssl x509 -in cert.pem -text -noout创建 k8s TLS Secret
kubectl create secret tls tls-secret-name --key key.pem --cert cert.pem -n namespace-name配置Gateway
apiVersion: networking.istio.io/v1alpha3
kind: Gateway
metadata:
  name: tls-test-gateway
  namespace: namespace-name
spec:
  selector:
    istio: ingressgateway
  servers:
  - port:
      number: 443
      name: https
      protocol: HTTPS
    tls:
      mode: SIMPLE
      credentialName: tls-secret-name  # 引用泛域名证书
    hosts:               # 可选
    - "*.liulike.top"    # 匹配所有子域名(如 a.example.com, b.example.com)
    - "www.liulike.top"  # 匹配单个域名
    - "liulike.top"      # 同时支持主域名
  - port:
      number: 80
      name: http
      protocol: HTTP
    tls:       # 此项不配置,配置好像有问题
      httpsRedirect: true  # 强制重定向到 HTTPS
    hosts:               # 可选
    - "*.liulike.top"    # 匹配所有子域名(如 a.example.com, b.example.com)
    - "www.liulike.top"  # 匹配单个域名
    - "liulike.top"      # 同时支持主域名
配置 VirtualService
apiVersion: networking.istio.io/v1alpha3
kind: VirtualService
metadata:
  name: tls-test-vs
  namespace: namespace-name
spec:
  hosts:               # 可选
  - "*.liulike.top"    # 匹配所有子域名(如 a.example.com, b.example.com)
  - "www.liulike.top"  # 匹配单个域名
  - "liulike.top"      # 同时支持主域名
  gateways:
  - tls-test-gateway
  http:
  - route:
    - destination:
        host: test-service
        port:
          number: 80
tls.mode: SIMPLE 的作用
| 模式 | 行为 | 场景 |
|---|---|---|
| SIMPLE | TLS 终止于 Gateway,后端明文通信 | 普通 HTTPS 服务 |
| PASSTHROUGH | TLS 透传给后端服务,由后端自行处理 TLS | 后端服务需自行管理 TLS |
| MUTUAL | 双向 TLS(mTLS),客户端和服务端均需验证证书 | 高安全要求的内部服务 |
| AUTO_PASSTHROUGH | 自动协商 TLS 参数,透传给后端 | 需要灵活 TLS 配置的场景 |
与后端也建立HTTPS
若后端服务仍需 HTTPS 通信(如跨集群安全传输),可在
DestinationRule中指定https端口yamlapiVersion: networking.istio.io/v1alpha3 kind: DestinationRule metadata: name: tls-test-dr namespace: namespace-name spec: host: test-service trafficPolicy: tls: mode: SIMPLE # 与后端服务建立 TLS 连接 portLevelSettings: - port: number: 443 tls: mode: SIMPLE
尝试记录
本地尝试成功记录,可能是偶然成功的
istio-ingressgateway转发真实IP
前置: istio 1.7.x +
在istio客户端节点,创建 istiocontrolplane.yaml 文件,内容如下
apiVersion: install.istio.io/v1alpha1
kind: IstioOperator
metadata:
  namespace: istio-system
  name: istiocontrolplane
spec:
  profile: default
  components:
    ingressGateways:
      - name: istio-ingressgateway
        enabled: true
        k8s:
          service:
            externalTrafficPolicy: Local
externalTrafficPolicy 可选值:
Cluster【默认】:流量会被随机分配到集群所有节点的 NodePort 或 LoadBalancer IP,优点:负载均衡更均匀,缺点:可能丢失客户端真实源 IP(需通过
X-Forwarded-For头获取)Local:流量只会被路由到 运行了目标 Pod 的节点,优点:保留客户端真实源 IP(无需额外配置),减少跨节点流量(提升性能),缺点:负载可能不均(若某些节点无 Pod),需确保负载均衡器支持(如云厂商的 LoadBalancer)
执行
$ istioctl install -f istiocontrolplane.yaml如
$ istioctl install -f istiocontrolplane.yaml
WARNING: Istio 1.21.0 may be out of support (EOL) already: see https://istio.io/latest/docs/releases/supported-releases/ for supported releases
This will install the Istio 1.21.5 "default" profile (with components: Istio core, Istiod, and Ingress gateways) into the cluster. Proceed? (y/N) y
✔ Istio core installed
✔ Istiod installed
✔ Ingress gateways installed
✔ Installation complete
Made this installation the default for injection and validation.
这将会重新部署istio-ingressgateway
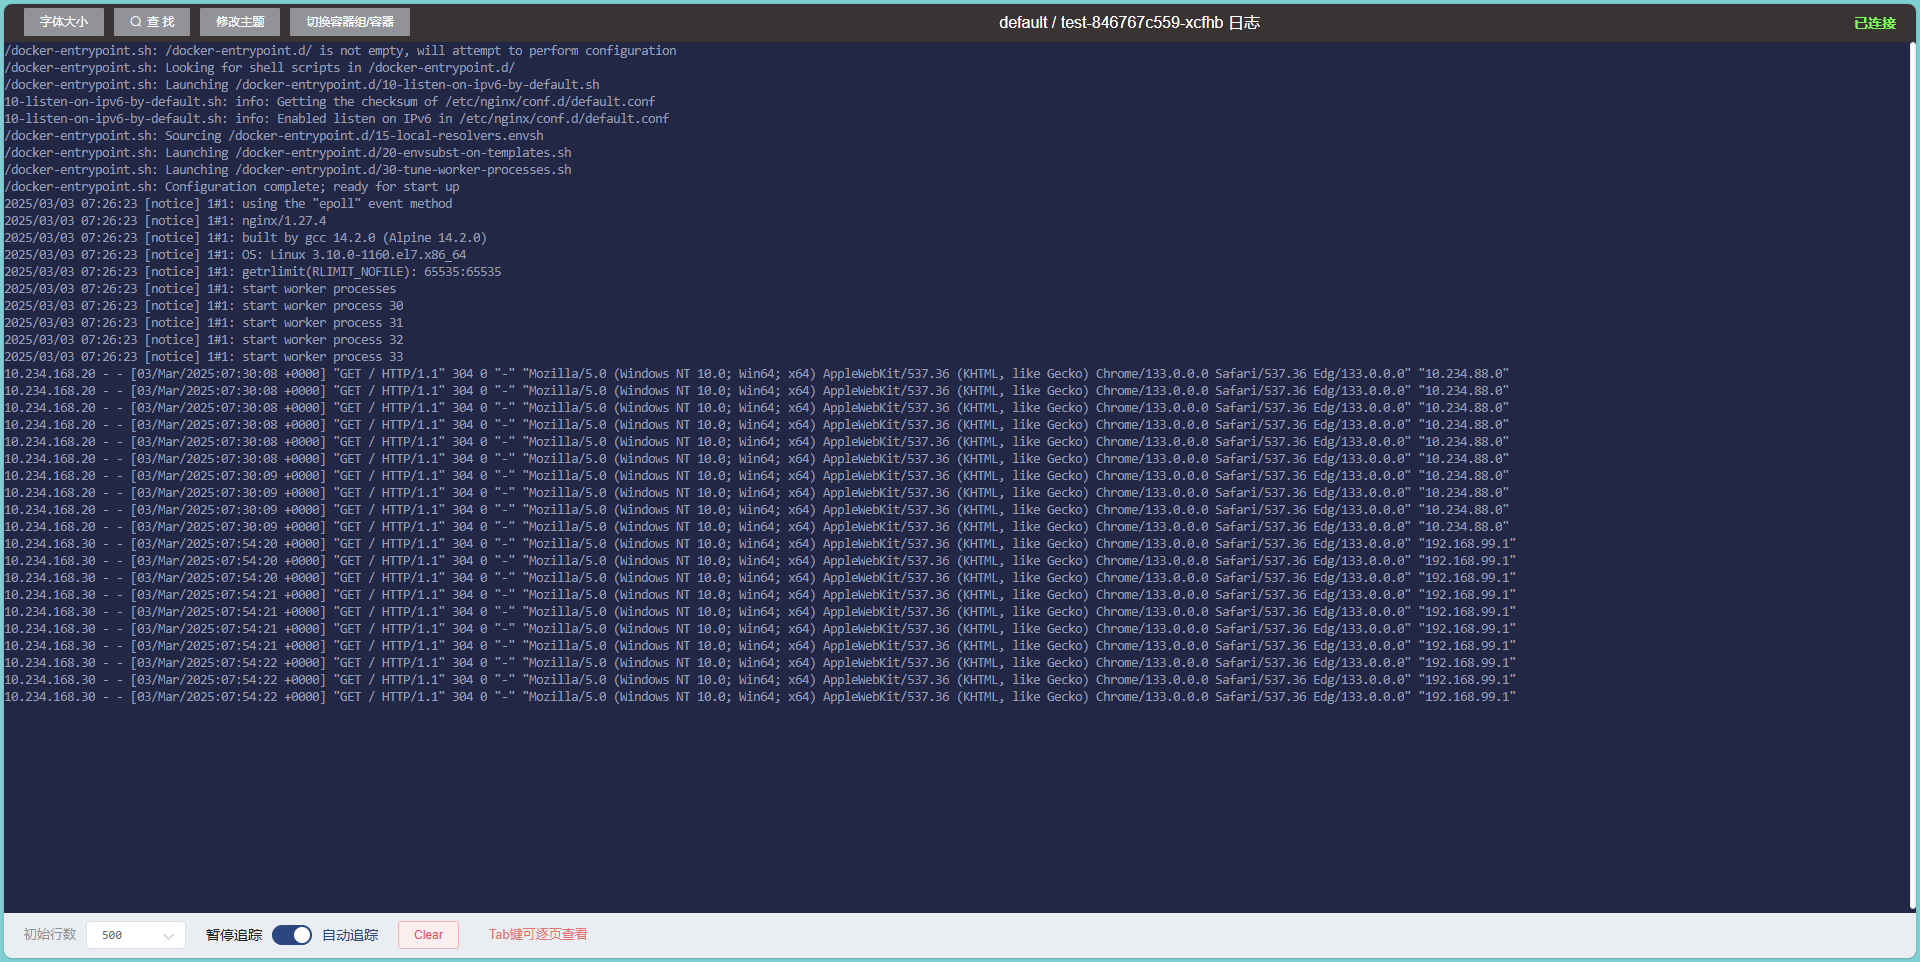
然后nginx的$http_x_forwarded_for即可获取到真实IP【10.234.88.0原来的istio-ingressgateway容器ip,192.168.99.1本地浏览器所在电脑ip】